Heads up! To view this whole video, sign in with your Courses account or enroll in your free 7-day trial. Sign In Enroll
Well done!
You have completed Introduction to Git!
You have completed Introduction to Git!
Now we'll show you how to add a GitHub repo as a remote, and push commits there.
Update
GitHub now provides free unlimited private repositories. Learn more in this post.
It's more common to host a central repo on a code hosting service. GitHub is the most popular Git service. Other alternatives that work similarly include BitBucket and GitLab.
- After setting up a repo and making some commits on your local machine, you create a new, empty repo on the hosting service's server.
- Then you add the new repo as a remote on your local repo, and push your commits there.
- Other developers can clone this central hosted repo to their machines.
- As you make more commits on your local repo, you can push them up to the central repo.
- Other developers can then pull the commits down to their cloned repos so they're up to date.
Creating a GitHub repo
Let's create a repo on GitHub, so we can push our medals repository code to it. To create a repo on GitHub, you'll need to create an account. Just visit https://github.com in your web browser, click the "Sign up" link [click], and follow the directions.
- Once you're signed up, we need to create a new repo. From any page on
github.com, there should be a menu with a "New repository" link. Click that.- We'll be asked to enter a repository name. Ideally repo names are all lower-case, and if there are multiple words they'll be separated with dashes.
- We can use any name we want, but let's just use
medals. - We'll enter a quick description of the repo: "Website for medals store."
- Now you can choose whether to make the repo public or private.
- You may see a check box allowing you to "initialize this repository with a README".
- It says to "Skip this step if you're importing an existing repository", which we are, so leave it unchecked.
- There may also be options to add a
.gitignorefile or a license file; you'll want to leave those set to "None". - When you're ready, click the button to create a repository.
Adding the GitHub repo as a remote
- You'll be taken to the web page for your new repository. This is the URL where the public will go to view your project's source code in their web browsers.
- Since no code has been pushed here yet, you'll just see a set of tips on getting started. These include shell commands that have been customized to work for your repo. [Note: If you accidentally chose to create a
READMEor license files when creating the repo, you won't see directions. If this happens, see the Troubleshooting section below.]- There's a section for use "if you've done this kind of thing before".
- There are two protocol options here, "SSH" and "HTTPS". Notice that the URLs in all the commands change depending on which option you select.
- To get started, we'll want to select "HTTPS", although you might want to switch to "SSH" later. See below if you want more info on SSH.
- Let's go to our terminal, and run the commands they suggest in the section to "push an existing repository from the command line". If you have 2 factor authentication on, you will need to get a personal access token.
git remote add origin [URL]
- As the GitHub instructions suggest, we'll give the remote repo a name of
origin. This is the same name that would have been set up by default if we had cloned our local repo from the GitHub repo. - Now we need the second argument, the URL of the remote repo. We'll just copy the URL from the command shown in our browser. Then we'll paste it into the terminal.
- Note for Workspaces users: How to Paste into the Workspaces Console
- Once all that's typed in, press Enter to run the command and it will add the GitHub repository as a remote repo.
The second command GitHub recommends we run is a new command, git push.
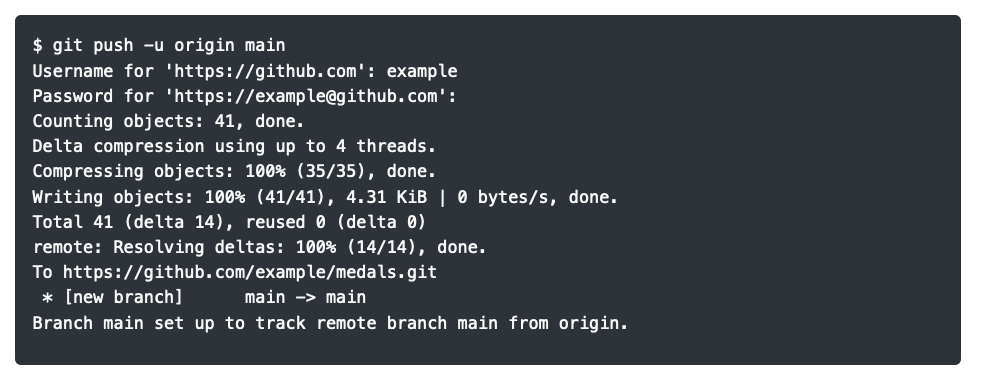
git push -u origin main
UPDATE - Renaming the default branch from master to main
- Whereas the
git pullcommand "pulls" changes from a remote repo into your local repo, thegit pushcommand "pushes" changes from your local repo into a remote repo.git pullgets changes made by others,git pushshares changes you've made with others.- GitHub is recommending a few arguments to
git pushas well. - First is the
-ucommand line option. The-u, orset-upstreamoption means that you want Git to remember the repo and branch you are about to specify, and make all futuregit pushcommands push to that repo and branch by default. That way, you won't have to specify a repo and branch each time you rungit push. - The next two arguments need to actually specify that default repo and branch.
- We'll use a repo of
origin. - And we'll specify the only branch that exists in the remote repo, the one branch that gets created by default,
main.
- We'll use a repo of
- When we run the command, because we used an
httpsURL for the remote repo, we'll be prompted for a user name. You should enter the user name you chose when setting up your GitHub account. - Then we'll be prompted for a password. Again, enter the password you chose when setting up your account.
- If everything works, you'll see several messages as Git uploads our commits to the remote repo.
- GitHub is recommending a few arguments to

Using SSH with GitHub
SSH is an alternate, secure way to connect to GitHub. It's convenient because once it's properly set up, you won't have to type your username and password every time you push or pull from a GitHub repo. But setting it up does require some experience with the terminal.
Sorry, but we can't help diagnose any issues you have with SSH; you'll be on your own.
If you want to set it up, GitHub has a tutorial here.
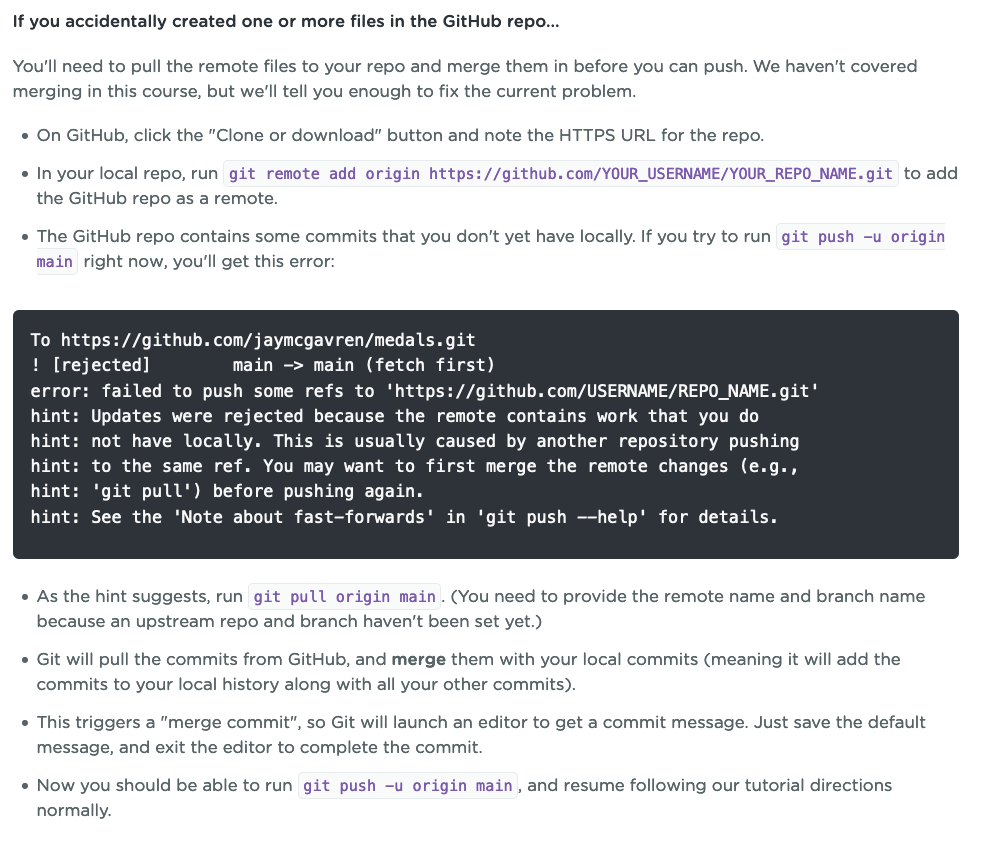
Troubleshooting

A pre-populated GitHub repo
Practice is important - we encourage you to set up a repo of your own and follow along with the demonstration in the video.
We do realize this may not be practical for everyone, though. If you just want to browse the finished result, here's a GitHub repo we've set up.
Related Discussions
Have questions about this video? Start a discussion with the community and Treehouse staff.
Sign upRelated Discussions
Have questions about this video? Start a discussion with the community and Treehouse staff.
Sign up
You need to sign up for Treehouse in order to download course files.
Sign upYou need to sign up for Treehouse in order to set up Workspace
Sign up